
Planning an event is only half the journey. The real challenge lies in promoting it through the right channels.
The ground zero of all online marketing efforts is a landing page that you can share with your target audience to inform them about essential event information and collect registrations. With PosterMyWall Events, you can create an engaging, informative, and visually appealing event landing page in minutes.
In this guide, we’ll walk you through the process of creating an event page on PosterMyWall and embedding it on your website or blog.
Create an event page on PosterMyWall
Click on ‘Events’ on the left panel of your My Stuff. Then hit the ‘Create a free event’ button.
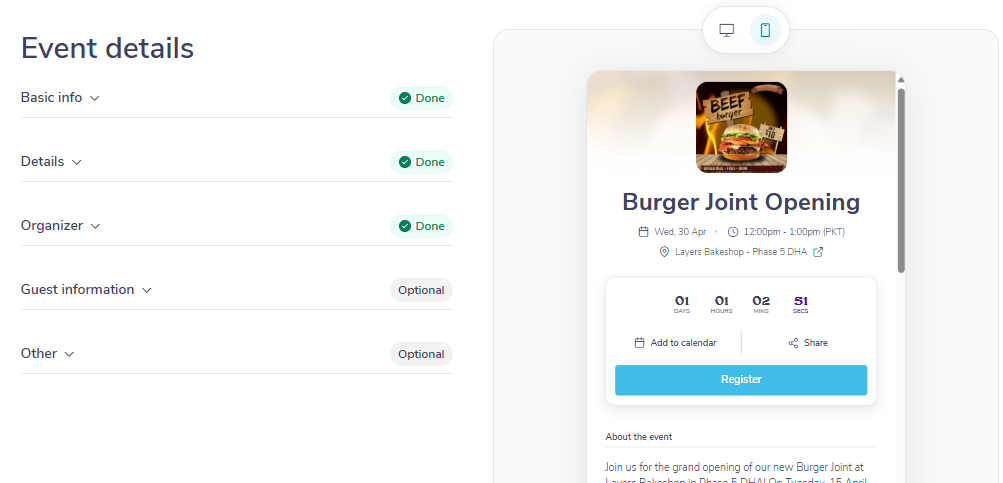
Basic info
On the right, you can see a preview of the event page for both mobile and desktop; use the toggle buttons above the preview to switch. As you fill in your event details on the left, the right side will update.
According to the name of your event, the AI writer will suggest* the type of your event in the drop-down menu. For example, the AI writer will suggest ‘Sports & fitness’ as the type for a volleyball game.
Then select the date and time of the event. You can make it a recurring event* (daily, weekly, or monthly) by turning on the ‘Repeat’ toggle.
You can also show the countdown to the event by clicking on the toggle for ‘Countdown’.
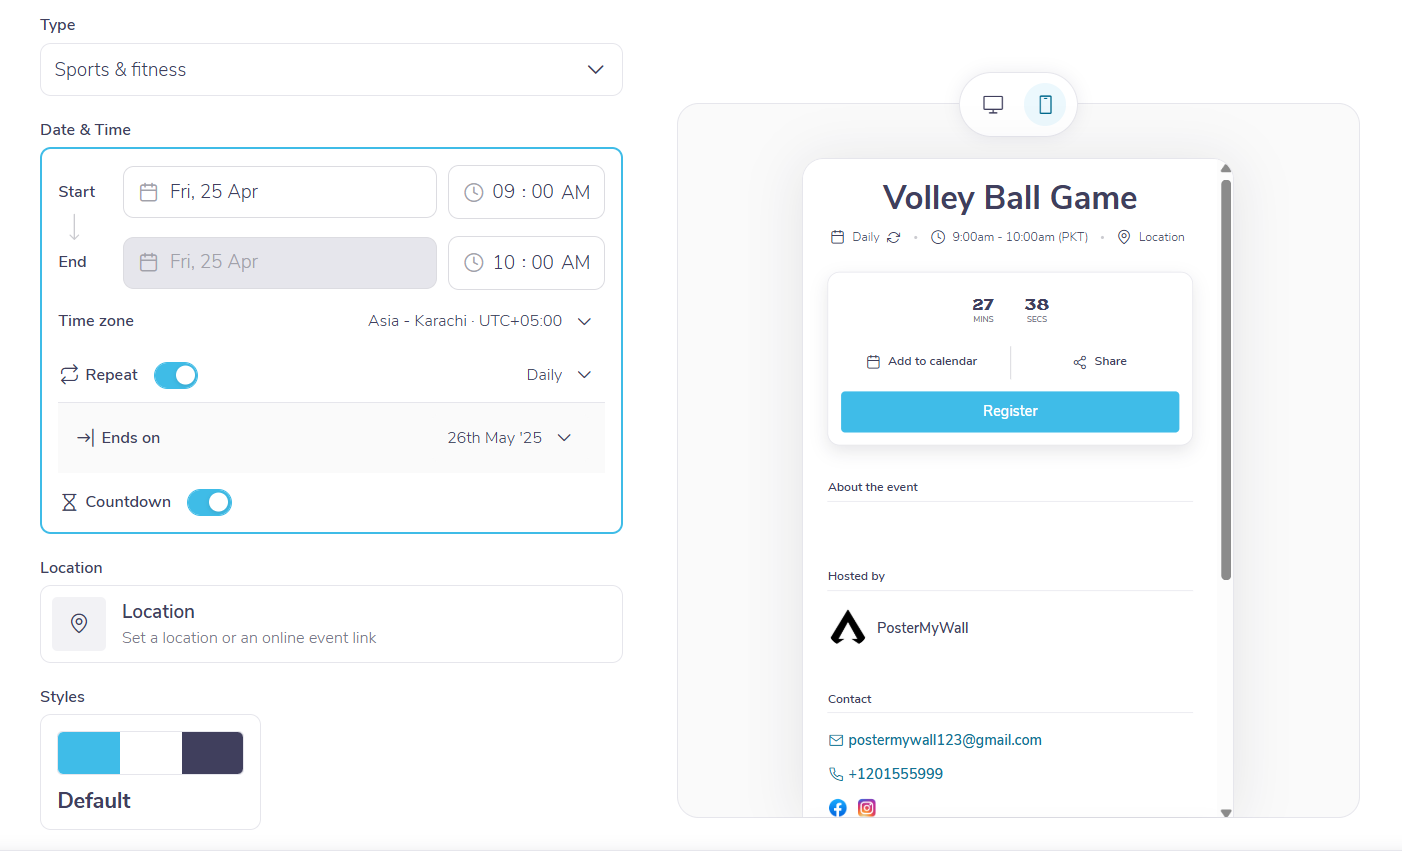
For an offline, in-person event, you can add the Google Maps location, along with manual directions. If you wish to change this location, click on it and type the name of another location in the search bar that appears. For an online event, you can paste the meeting link in the text box or create a new Zoom or Google Meet link.
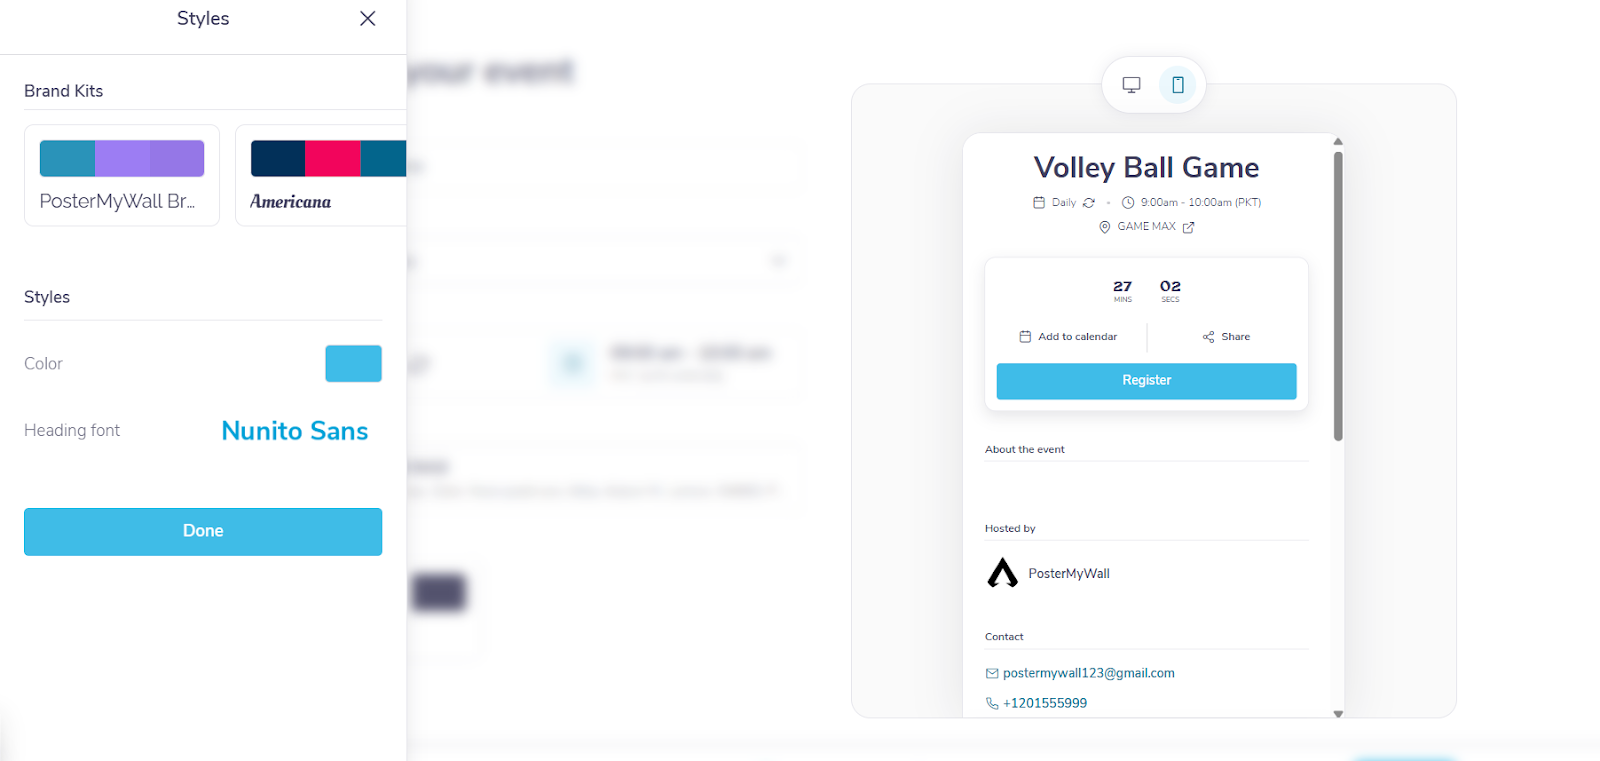
Then click on ‘Styles’ to choose the color palette and fonts for your event page. Select a pre-existing Brand Kit* for this, or manually select the color and heading fonts. For the heading font, you can either use the PosterMyWall fonts or upload your own fonts from your device. Once done, click on ‘Next’.
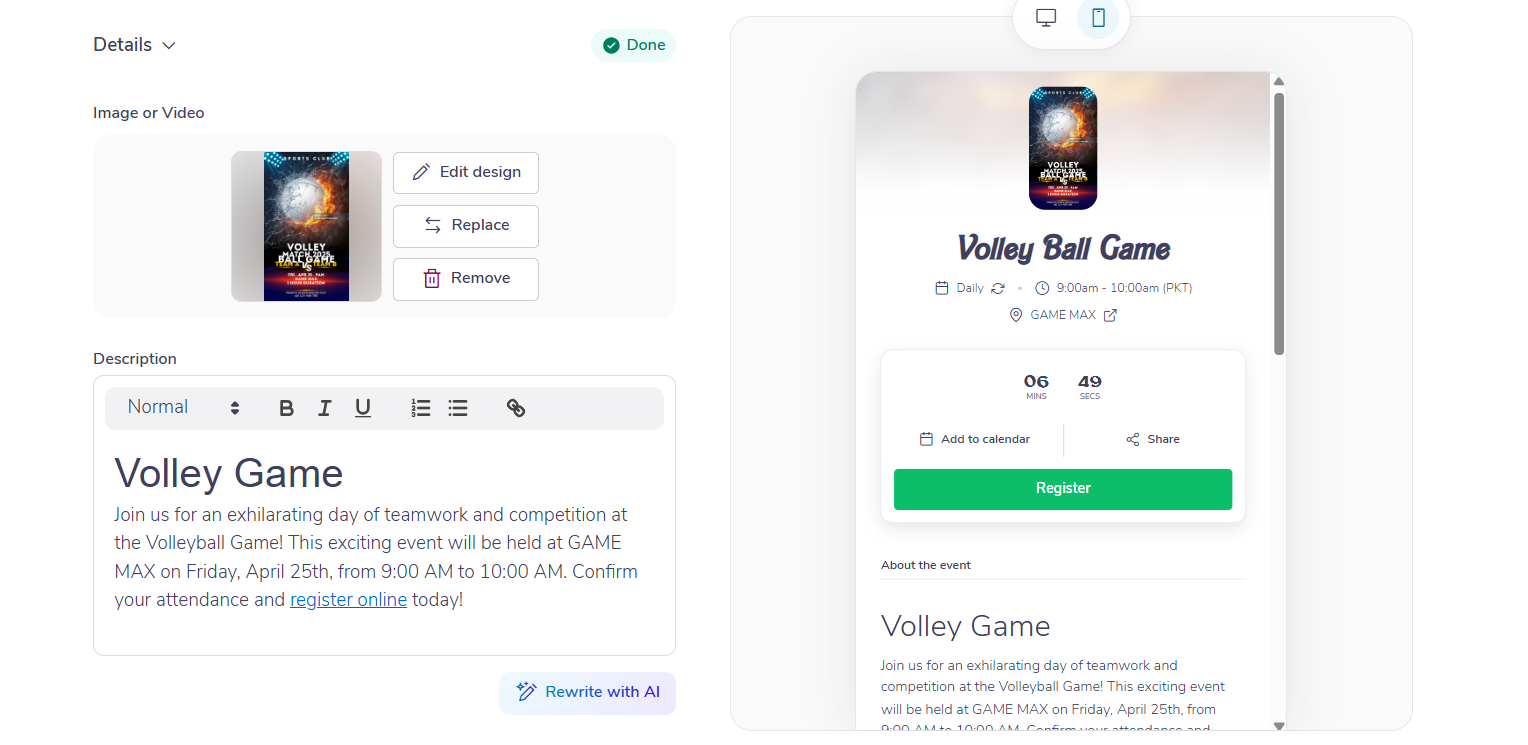
Details
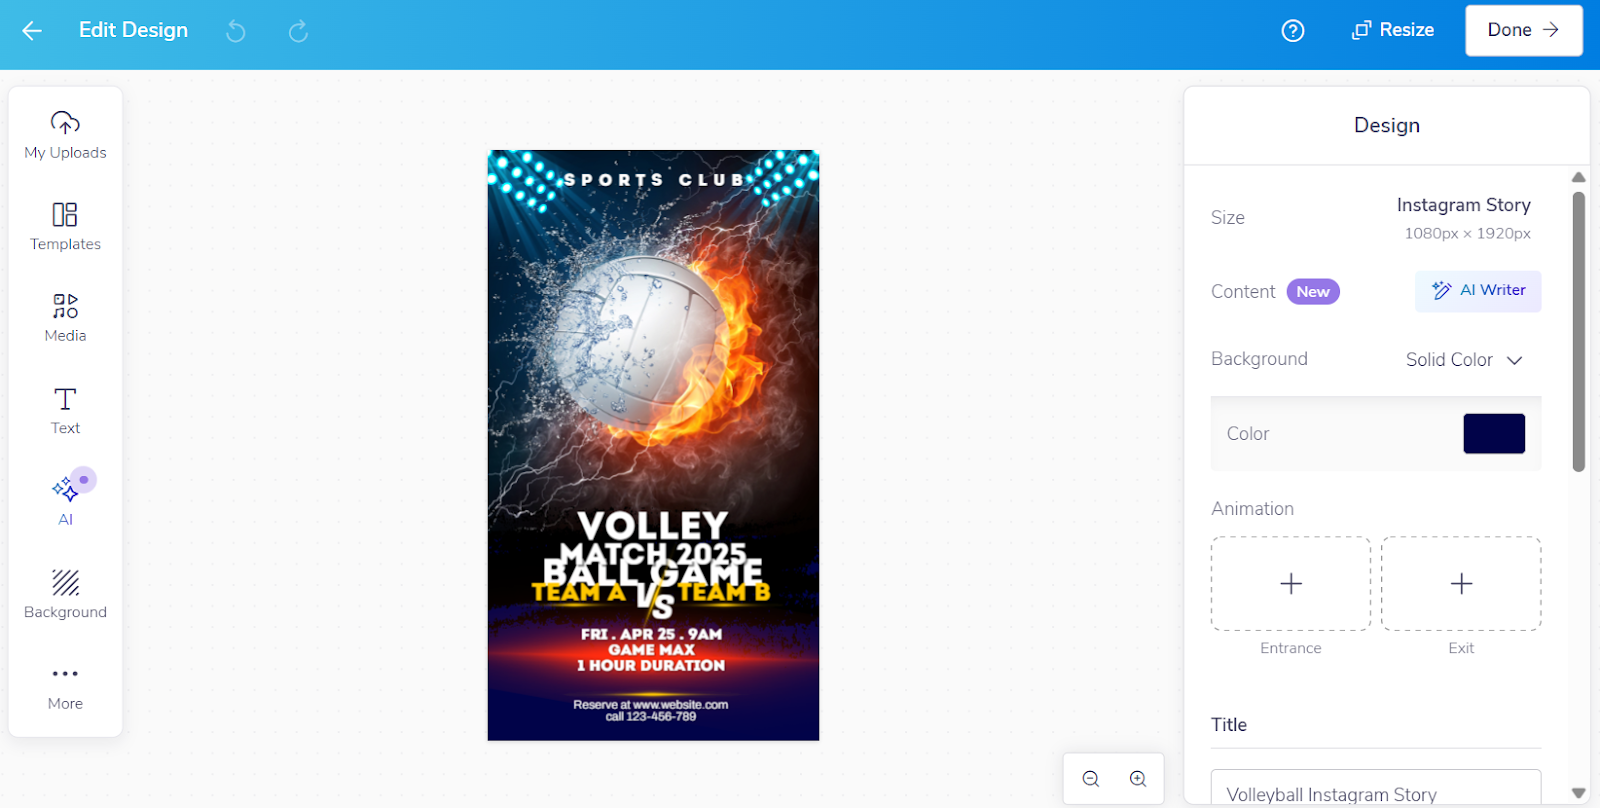
On the next page, you can review the basic event information. You can also add a cover photo or video (PosterMyWall templates, your designs, or media uploaded from your device). When you choose a PosterMyWall template, the design editor opens up, and your event details will be added to it automatically*. You can make further edits, or click ‘Done’ if you’re satisfied.
The event description gets automatically written by the AI Writer*, but you can also rewrite it with the AI Writer or manually. You can add a heading and hyperlink text (e.g., adding the link to your website on words like ‘Register Online’).
Organizer
You can select the organizer information that you wish to show on the event page. Details from your individual and/or team profile will already be visible. If you click on your own or a team member’s profile, the name, email, phone number, and social media profiles of your chosen person will get prefilled.

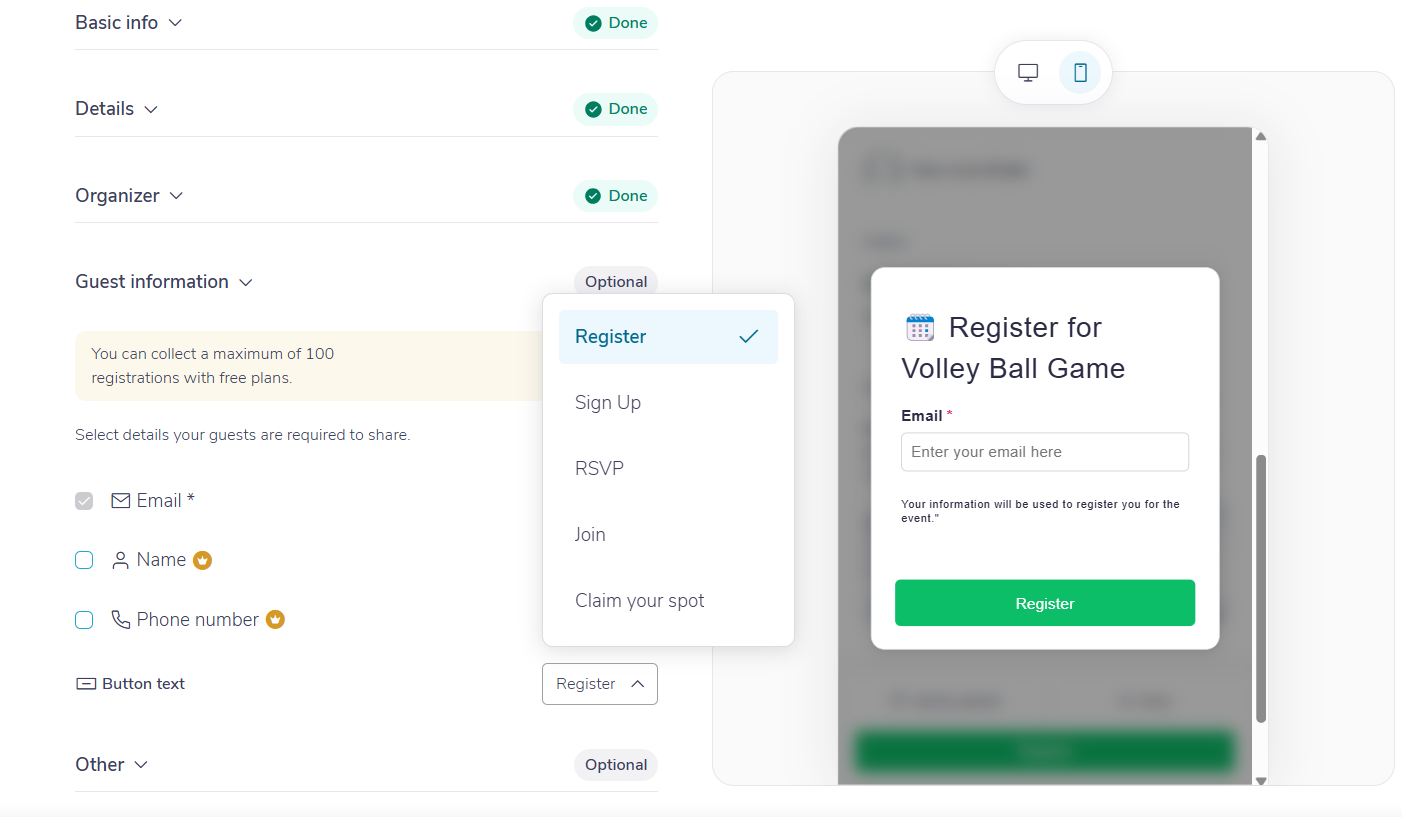
Guest information
When you click on the Guest Information* section, you’ll get a preview of what the registration will look like. The user is required to input their email, but adding names and phone numbers is optional.
You can also change the button text from the default ‘Register’ to other options, including ‘Sign Up’, ‘RSVP’, ‘Join’, and ‘Claim your spot’.
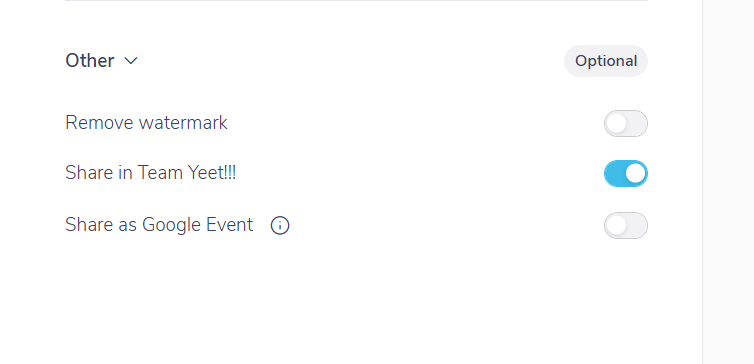
Other
In the ‘Other’ section, you can remove the watermark*, share to your team*, and share the event as a Google Event (so it will be publicly listed on Google).
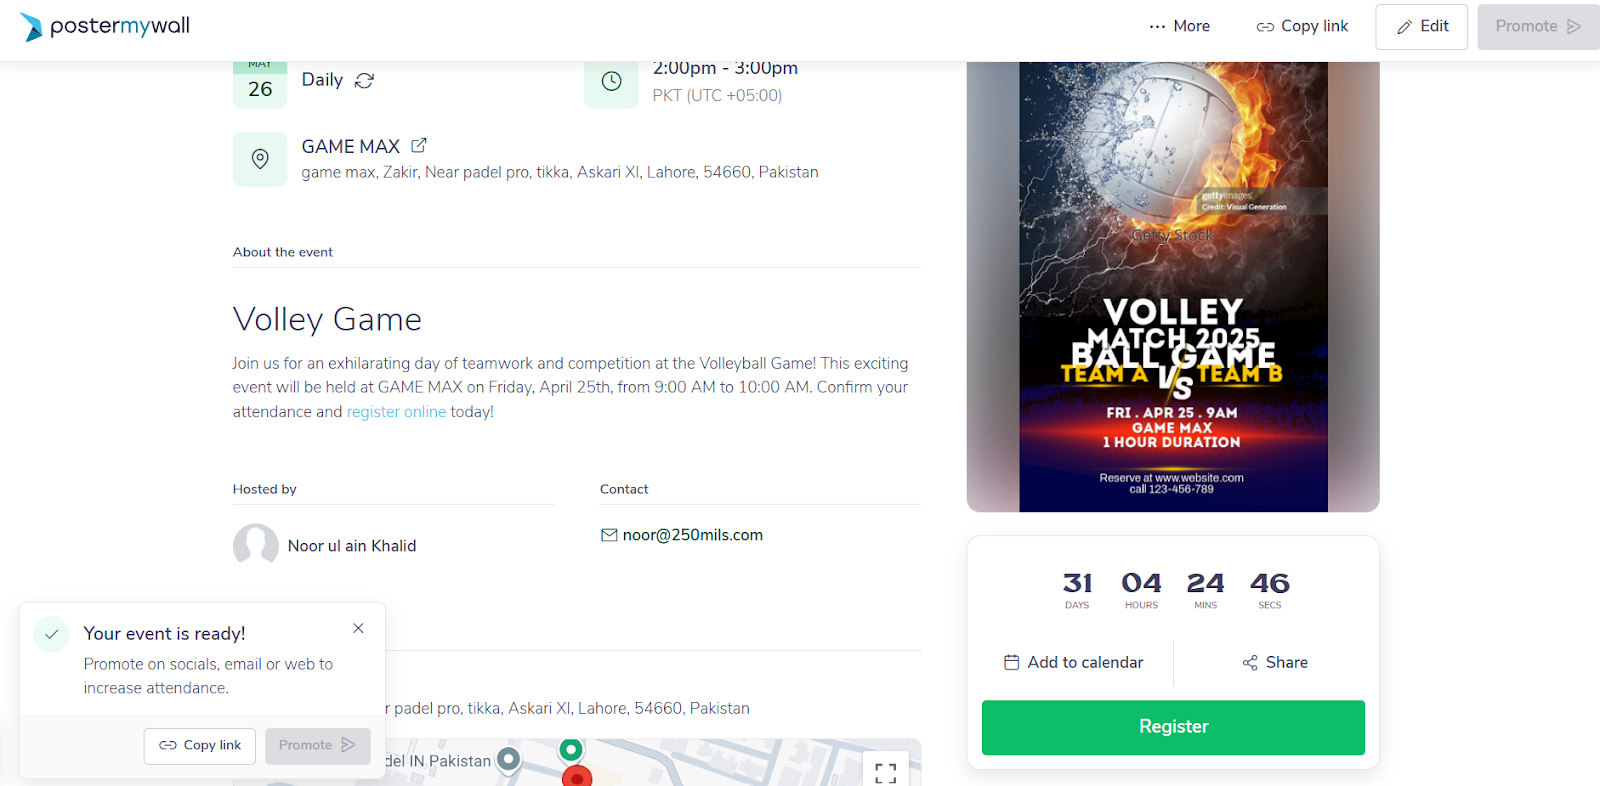
Once done, click on ‘Create’ to create your event page.
*These features are only available to Premium and Premium Plus subscribers of PosterMyWall.
Embed event on website
You don’t need any coding knowledge to promote your event on your website or blog. Just follow these simple steps:
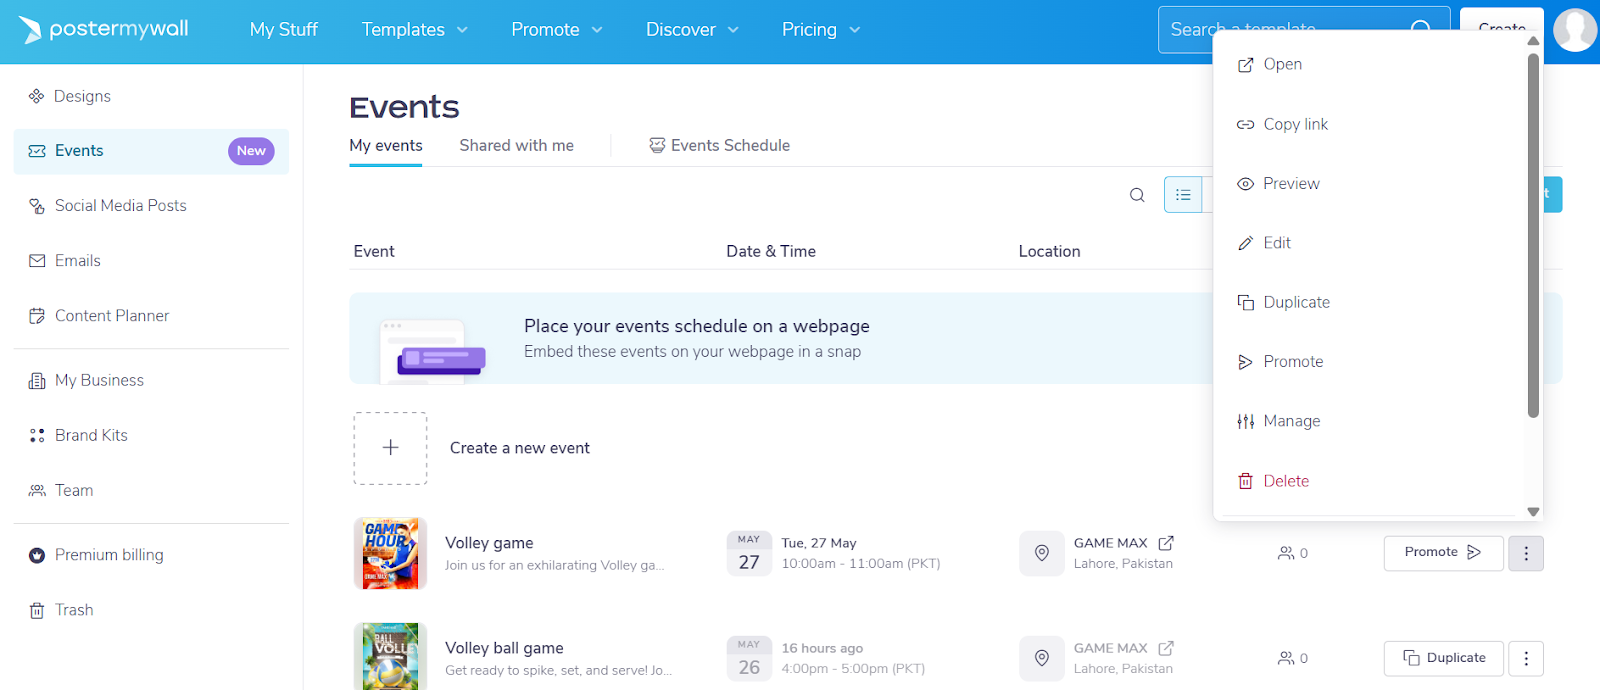
- Click the ‘Promote’ arrow button next to the event in the Events section of your My Stuff. The Promote button can also be accessed by clicking on the three vertical dots next to an event.
Note: The Promote feature is only available for current or future events, but not for past events.
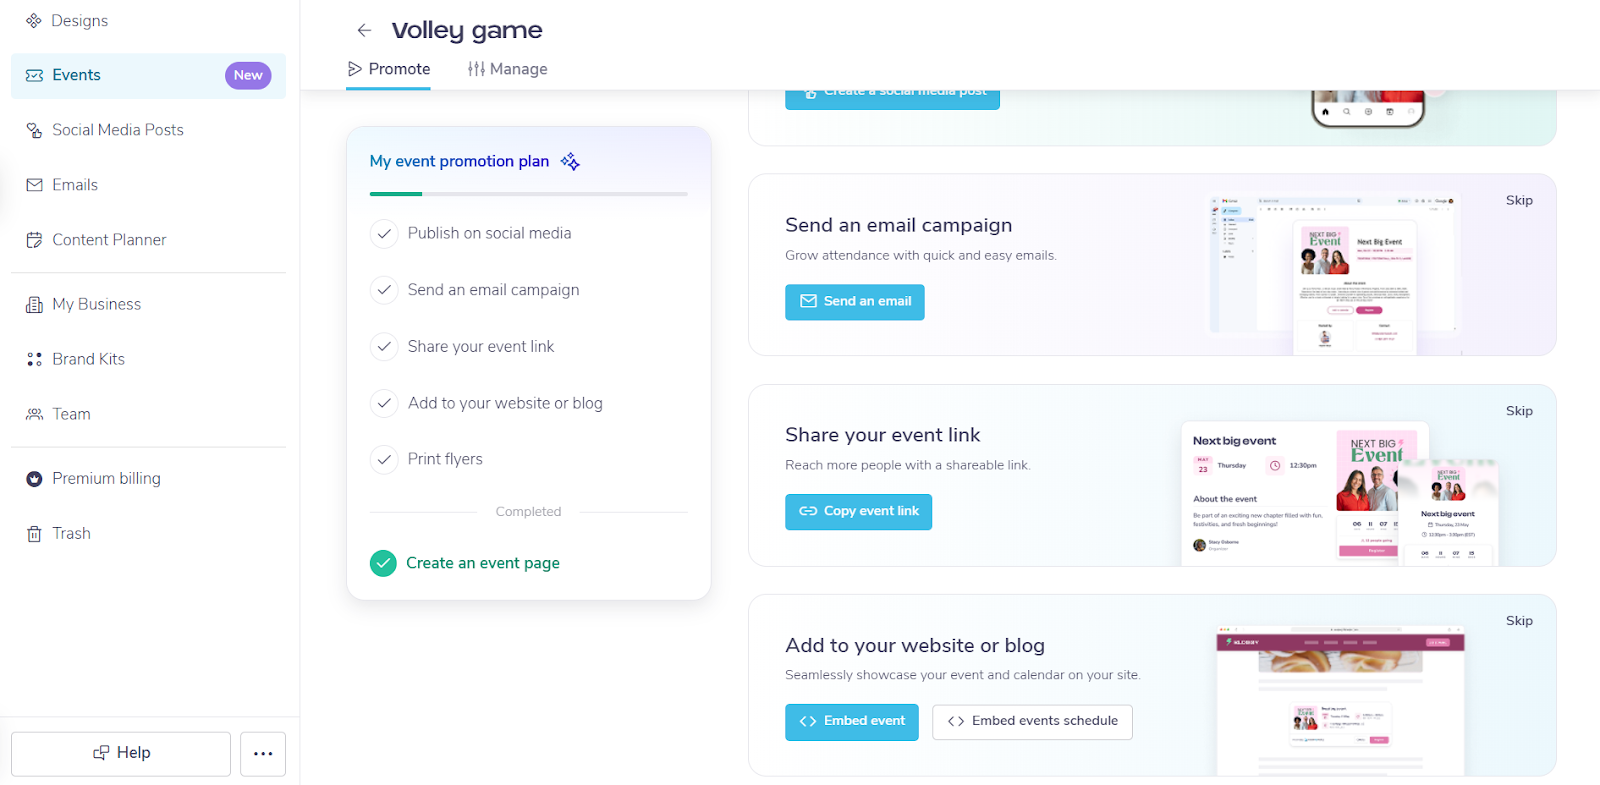
- Next, click on the ‘Embed event’ button.
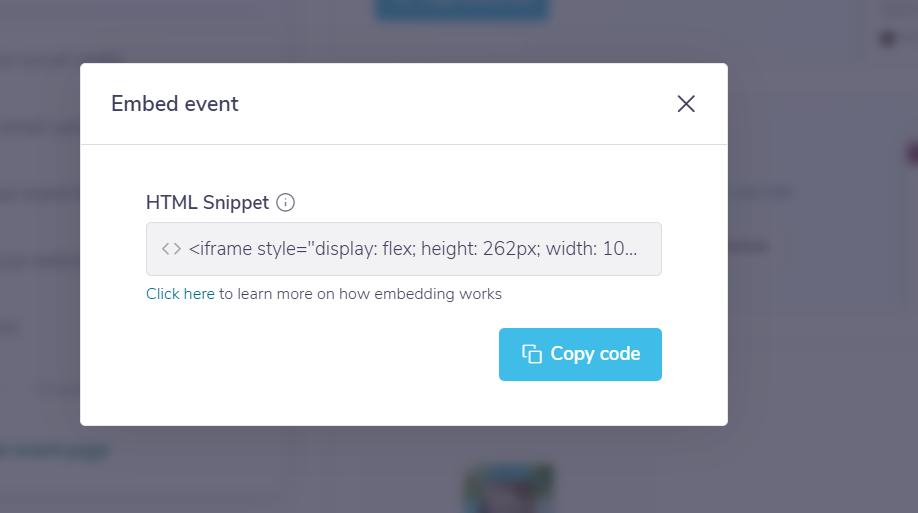
This will reveal the HTML Snippet for the event page. Copy the snippet by clicking the ‘Copy code’ button.
Here’s how you can embed this code on your website or blog:
WordPress
- Go to the post or page where you want to add your event.
- Click the + Block Inserter icon to add a new block.
- Search for ‘Custom HTML’ and select it. You can also type /html on a new line and press Enter to quickly add a new Custom HTML block.
- Paste the HTML snippet in the box provided.
- Click the ‘Preview’ option in the block toolbar to see how it looks, then hit ‘Publish’ or ‘Update’.
For more details, check out this helpful WordPress article.
Wix
- Navigate to the Settings in your site’s dashboard.
- Click on ‘Custom Code’ in the Advanced section.
- Click + Add Custom Code at the top right of the page.
- Paste the code snippet in the text box.
- Enter a name for your code (e.g., ” Volley Game”) to help you identify it later.
- Select one of the two options under Add Code to Pages:
- All pages: This adds the code to all of your site’s pages, including new pages you create in the future. Choose whether to load the code only once per visit, or on each page your visitor opens.
- Choose specific pages: Use the drop-down menu to select the relevant pages.
- Choose where to place your code under Place Code in:
- Head
- Body – start
- Body – end
8. Click Apply.
Squarespace
- In the Squarespace editor, open the page where you want your event to show.
- Click ‘Edit’ on a section and select ‘+’ to add a block.
- Choose the ‘Code’ block.
- Paste your PosterMyWall event landing page HTML snippet.
- Optional: Toggle ‘Display Source’ off to only show the embed.
- Save or publish your changes.
GoDaddy
- Visit your GoDaddy My Products page, scroll down to the Websites + Marketing section, and click Manage next to the website you want to edit.
- Select Edit Website or Edit Site to open your site in the website builder.
- Navigate to the page and location where you want to add your event. Click on ‘Add Section’, then choose ‘HTML’ under ‘More’
- Paste your HTML snippet into the Custom Code field.
- All changes are saved automatically. Use Preview to see the results, and if you’re ready for the changes to be made public, publish your site.
GoDaddy’s interface may vary depending on the version you use. For more information, check out this article.
The steps for showcasing your event schedule on your website or blog are similar. Check out our helpful guide on how to embed your PosterMyWall Events schedule on your website.
Creating an event landing page
With a user-friendly interface, AI-powered features, customization tools, and seamless embedding options for websites, PosterMyWall Events makes creating impactful event landing pages easy and efficient. Then you can promote your event via your website, social media, email, and print material like flyers and posters.
So what are you waiting for? Create an event landing page on PosterMyWall to spread the word about your event and boost registrations.